Things You Need:

- In this case, fabric ribbon is preferable.
- Use any size, color, shape buttons you like. I got my cupcake buttons at Hobby Lobby.
- Cut a circle out of a 5x5 square of fabric by folding it into quarters and cutting a rounded edge. Alternately, find something around the house to trace with approximately a 5" diameter.
- Frixion markers are the absolute best for marking on fabric. Mark all over your fabric and then iron it away; like it was never there at all. Best investment I've ever made in a sewing tool.
Prepping and Gathering the Ribbon:
Step 1. Cut a long piece of thread, thread your needle and then double the thread so that the two ends meet. Tie a knot at the end.Take your 8 1/2" piece of ribbon and fold it in half, right sides together. Line up the raw edges, this is the point when you can carefully melt the edges of the ribbon with your lighter so they don't fray. Next, sew a whip stitch straight across, (top dotted line in picture above.) After you are done stitching, unfold the ribbon and gently tug to make sure that your stitches are secure. No need to cut your thread yet.
Step 2. Now press your new seam over to one side and hold it down with your thumb. With your needle, carefully pick up one little thread of the backside of the ribbon and then go through the two joined edges. Repeat this until you get to the end. This makes a crisp, sturdy seam on the outside of the ribbon. Cut your thread. You should still have quite a bit of the thread, if so, tie another knot in the end. If not, cut a new piece, thread, and knot as in step 1.
Step 3. Now, starting on one side of the seam, sew a running stitch along the outside edge of the ribbon to the other side of the seam. I marked my edge with a dotted line so you could see.
Step 4. Gather the ribbon by pulling on the needle side of the string so that the ribbon bunches up. Be careful not to pull the beginning knot through the ribbon. Spread the gathers so that they are more even and leave yourself a bit of hole that is about the size of a dime. Tie off the thread by sticking the needle through the edge of the ribbon and putting the needle through the loop before pulling it taut. I do this a couple times for good measure. Cut your thread and any little tails you have left behind.
Making the Yo-yo:
Step 5. Thread your needle as in step 1. After you have cut your circle out, hold your circle so that the wrong side of the fabric is facing you. Sew a running stitch all along the outer edge of the circle, (along the dotted line in the photo above.) Once you have gone all the way around, your circle should look similar to the picture above, right.
Putting it All Together:
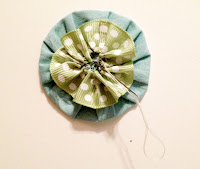
Step 7. Thread the ribbon ring onto the needle and thread so that it sits on top of the yo-yo you just made.
Step 8. From the inside of the ribbon ring, slip or whip stitch all around the inner edge, connecting the ribbon with the folds on top of the yo-yo. Be careful not to go through all the way to the back of the yo-yo because it begins to look messy if you do. This doesn't need to be perfect because it will not be seen. Once you get all the way around you're all set to move on! No need to cut your thread unless you are running low.
Step 9. Sew on your button. I try to sew the button mostly to the yo-yo folds in the center. I like to start underneath the button, catching a few folds, up through the first button hole, down through the second, catch a couple of folds and then out between the ribbon ring and yo-yo. It's not an exact science, do whatever makes you feel the most secure.
Step 10. That's it! Make sure you knot your tail as close to the fabric as possible between the two layers, cut all your tails, and you're done! You can sew or hot glue these to hair clips, headbands, clothes, bags etc...
They really do turn out cute, I can't wait to see it in Emory's hair!
I hope this has all made sense. Comment if you have any questions. Post pictures if you make your own! This is my first tutorial so constructive criticism is welcome. :)
-Michelle


No comments:
Post a Comment